Tuesday, August 11, 2009

Chicken Enchiladas Verdes - Quick and Easy

My earliest memory of enchiladas verdes was when I was a kid. My parents used to take us to this mexican buffet called Pancho's-- any of you remember it?? Raise the flag! (lol just thinking about it.) By no means was it authentic, but it was cheap, quick, and pretty good for the price. Well, since then, they've closed down many of their locations. Consider yourself lucky if you have one near you...lol (insert sarcasm here:)

In memory of Pancho's, here's a quick and easy enchiladas verde recipe I created on a whim. It was actually pretty good and only takes about thirty minutes to prepare. Comments welcome.

Ingredients:

10-15 white corn tortillas
1 can of green chile sauce
2 cups of white cheese (jack, queso blanco, or white cheddar, etc.)
1 can of diced green chiles and tomatoes (Rotel brand is what I used.)
2 cups of cooked, shredded chicken (I used some left over from a previous dish.)
1/2 cup of canola oil
9 x11 baking dish


Directions:

1. Heat canola oil in shallow pan or skillet on medium heat. Quickly dip one tortilla in the oil until softened (don't leave them in too long, or they will begin to harden.) Lay a tortilla flat and fill with cheese and shredded chicken-- about 1/4 cup of filling down the center. Tightly bring the edges over the filling to close it and then lay the tortilla seam side down in a 9x13 baking dish. Repeat until all of the tortillas are filled.

(excuse the blurry photos... I was having technical difficulties with my camera)


2. Pour verde (green chile) sauce over enchiladas.


3. Add green chiles and tomatoes.


4. Add remainder of chees(es).


5. Heat in oven on 350 degrees for twenty minutes. Cheese should be melted.


6. Let cool for five minutes, and serve with a coordinating side dish. I chose Mexican rice and I mixed in black beans.


Friday, July 31, 2009

Blackend Salmon w/ Summer veggies

The first time I had blackened salmon was at the Aquarium restaurant in Kemah, Texas some years ago. It was so good, I had to find out what was in this 'blackened' seasoning. Come to find out, it just a bunch of seasonings I use on a regular basis all combined into one. Go figure. Anyways, this is one of my favorites, and I thought I'd share it with you all. What's your favorite fish and how do you prepare it? Please comment here.

What you'll need:

2 fresh Atlantic salmon fillets (skinned is ok)
2 tbsp blackened seasoning (or cheat using a store bought one...lol)
1/2 lb veggies of your choice (I used zucchini, yellow squash and broccoli)


Directions:


1. Rinse and pat fillets dry with a paper towel.


2. Evenly coat both sides of the fillets with blackened seasoning.


3. Heat a cast iron skillet with medium-high setting. Add a teaspoon of olive oil to skillet. If you don't have a cast iron one, stainless steel is the next best thing. Once pan is hot, add fillets. If your fillets have skin, cook skin side up. After five minutes or so, carefully peel back and remove skin.


4. While your salmon fillets are cooking, prepare your veggies. I chose to julienne one yellow squash and one zucchini for this dish.


5. I also used one large broccoli crown.


6. Add all veggies to a steamer pot, or saute in a pan with olive oil and oregano. Steam until veggies are lightly steamed and firm.


7. Cook salmon for about 4-5 minutes on each side. When the flesh of the salmon is slightly transparent, it's done. You definitely do not want to overcook your salmon...it will result in a dry, non flaky piece of fish!


8. When done, serve with veggies! Enjoy.


Thursday, July 16, 2009

Creole Chicken w/ Fried Cabbage


A friend needed a place to stay at one time. I was living alone then, and allowed her and her canine companion to live with me for a month until she saved money for closing costs on her new home. In exchange for my sofa bed, she would cook, clean and do grocery shopping. I never asked her do to these things, she just did. I didn't cook as often then as I do now, because I was single and always on the go-(fast food, delivery and take out where my friends...lol) One day, she created this dish that she said her mother used to make for her all the time growing up. She basically boiled a whole cut chicken and simmered it in tomato sauce and seasonings. She served it over rice, and I must say that it was a delightful detour from the norm.

I decided to make my version of the dish a few weeks ago. Instead of using a whole chicken, I used drumsticks, because that's what I had in the freezer that day. I also thought I'd add some fried cabbage on the side to balance the meal. Have you ever had a friend introduce you to a dish that was part of their family tradition? Please share your comments here.


Creole Chicken w/ Fried Cabbage

Ingredients:

1 lb of chicken (cuts of your choice)
2 small cans of tomato paste
1/2 cup celery
1/2 cup scallions
1/2 onion
1/2 bell pepper
1/4 cup fresh corn (optional)
1/2 cup of frozen okra (optional)
1 can of diced tomatoes
1 tbsp fresh ground black pepper
4 tsp sea salt
1/2 tsp dried thyme
1 cup of hot, cooked rice (whole grain is my preference)

for fried cabbage:

1/2 head of fresh green cabbage
1/2 cup chicken stock
1 tsp red pepper flakes or ground cayenne pepper
1 tsp paprika
1/2 tsp salt


Directions:

Rinse and place chicken in a large pot of water. Bring to a rolling boil.


Add all seasonings (salt, pepper and thyme). Continue to boil uncovered for 20 minutes.


Add celery, corn, and okra. Omit items if desired.


Add tomato paste and let simmer until water is reduced by almost half.


Add onions, scallions and bell peppers.


Let simmer for another ten minutes, while you are preparing the cabbage.
Slice cabbage in thin strips, place in frying pan with chicken stock and seasonings.


Simmer on medium heat, covered until cabbage is tender.


Serve chicken over rice, and add cabbage on the side. Garnish with fresh parsley if desired.


Enjoy!
~S

Wednesday, July 01, 2009

Spinach Omlette (Sunday Brunch at home)

Of course this doesn't beat the brunch at the Four Seasons or the Ritz, but it comes really close--
(that was me tooting my horn, in case you missed it :) Just kidding.

Believe it or not, I didn't always know how to make an omlette. *gasp!* Some years back I had this crazy idea to impress Mr. Berry with breakfast one morning, and called a friend up to instruct me on how to create this egg masterpiece we call an omlette. My friend then invited me over to teach me how to make one. Afterwards, I asked, "That's it?..." My friend said, "Um yep...that's it." I don't know why I thought it would be more complicated to make. So I went to the grocer's to pick up the things I needed to make the omlette, and needless to say, Mr. Berry enjoyed his breakfast that next morning. Since then, I've gotten more creative and honed in on my omlette 'stuffings' of choice.

Sherry's Omlette favorites:

Ham, grilled sweet onions, scallions, cheese (cheddar, pepper jack, swiss, provolone, paremesean, or mozarella), peppers, spinach, basil, and garlic. What's your favorite omlette combo? --comment here.

A couple of Sunday's ago, I was craving a spinach and cheese omlette. How did I make it, you ask? Like this:

Ingredients:

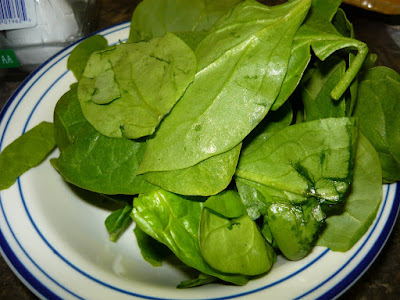
  • handful of fresh spinach
  • half an onion, diced
  • shredded cheddar cheese
  • two slices of jalepeno jack cheese
  • salt and pepper to taste
  • 3 eggs (sub egg whites or egg beaters if you wish)
  • basil
  • parsley
  • one glove of garlic
  • 8-10 inch omlette pan or cast iron skillet
  • (or if you want to cheat you can use one of those omlette 'shaped' pans...


Sautee fresh spinach in a teaspoon of olive oil and galic.


When spinach is sauteed to your liking, set aside.


Dice half an onion and saute in a teaspoon of butter and basil until slightly transparent.


Crack three fresh eggs into a bowl and beat well. I always add a two teaspoons of warm water to the mixture to make the eggs fluffy. This is completely optional, of course.


Add a pinch of salt and pepper to eggs.
Melt a teaspoon of butter or non stick spray to your pan, then add eggs.


As the outside of the omlette cooks, pull the outsides to the middle of the pan to insure even heat distribution to the uncooked portion of the omlette.

Once the omlette is mostly done, start to add your cheddar cheese. Then proceed with the spinach and onions. Gently slide omlette out of pan onto a plate and carefully fold over. Top with slices of pepper-jack cheese and garnish with fresh parsley.


Optional: Add a fresh fruit salad on the side- I had some apples and oranges on hand, so that's what I chose to use, but by all means go crazy with kumquats and starfruit if you wish. lol


My fancy-smancy apple corer ;) Ya' dig?


No brunch is complete without a mimosa! (or virgin momosas with sparkling white grape juice if you a party pooper.)


Voila! Enjoy...

-S


Thursday, June 25, 2009

Tazo Chai Icecream Float

One of the posters on a networking site that I frequent suggested this. Because I am a big fan of the Chai lattes from Starbucks and often purchase the concentrate to enjoy my Chai lattes at home, I figured this would be a quick try. It actually turned out pretty well!

All you need is:

  • Chai concentrate (brand of your choice; I suggest Tazo)
  • Vanilla Icecream (brand of your choice; I'm partial to Haagen-Daz Vanilla)
Two scoops of vanilla icecream in a bowl; Pour about a 1/4 cup of Chai concentrate over icecream. Yum!


Wednesday, June 17, 2009

Grilled Chicken Spinach Wraps


I got this idea from reminiscing. When I was in college, there was a food court in the basement of our dormitory adorned with the usual cafeteria style and snack bar foods. On occasion, they would offer something different, to appeal to more tastes. I specifically remember a "build your own wrap" station, in which you could pick from a variety of veggies, beans, rice and/or grilled chicken. They would then pan saute everything you chose in a skillet in front of you, and then wrap it up like a burrito, cut it in half and serve it on a plate (or in my case, most days I would take it to go in a Styrofoam container and go up to my room to study). I miss those wraps...lol They were good, and a great alternative to burgers, pizza, and chicken fingers. What was your favorite food memory from college? Please leave your comments here.


Since I had some left over grilled chicken and corn-black bean salsa from our Mesquite chicken salad, I decided to use my creativity to devour all the ingredients we had left :)

I sautéed some spinach in some virgin olive oil and garlic until tender and prepared some yellow rice (you can use any rice, of course) with diced peppers.


Warm the spinach tortilla wrap in the oven on 375 for five to ten minutes or until warmed throughout. Place a tablespoon of corn/bean salsa mixture in the middle of tortilla.


Add chicken, rice, and sautéed spinach.


Add cheese (optional) . I used jalapeño-jack.

Wrap like a burrito (envelope style) and cut in half.

Yep, it's that quick and easy, and it's a great snack or a fancy-smansy lunch box alternative to the usual turkey sandwich. Enjoy!